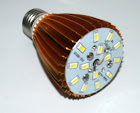
Have you ever wanted a Customized LED bulb.Because available LED lamps are not fitting to your requirements. I wanted to create a one because the available LED bulbs where only illuminate at one direction .Like this -
 |
| DIY Home Made LED Lamp |
I wanted to create a LED lamp that Illuminate all Directions for my wall Lamp,Here is the process of making a customized LED lamp.
In this tutorial I will show you how to create your own customized LED lamp for a low prize .First of all gather these items. Here are the list of items required to make 7W LED Lamp-
 |
| DYI Home Made LED Lamp parts |
Parts List
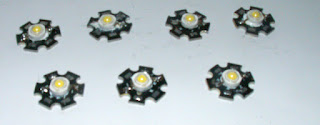
1W SMD LED's (Bright White) - 7SMD LED Base - 7
7W LED Drive Unit -1
Aluminium box bar (Squre Type) - 1
Circuit Wires - 1m
Screws - 14
Wire sleeves (optional) - 30cm
Bulb Adapter -1
Heat sink compound
Designing The LED Lamp
I'm sure you will be able to find those items in the Electronic store or you can purchase online from Ebay. These Items are very cheap only cost me $2.25 (Yep 7W LED lamp for $2.25). The Aluminum Box bar found from junk yard .Bulb Adapter was taken from a burnt CFL bulb.So those things where Free.The length of the Aluminum box bar depends on the Design of your Bulb.Here is my Design.
 |
| DYI Home Made LED Lamp Design |
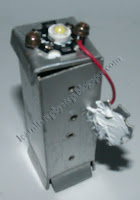
My design is to place 2 LED's each side of the squire Aluminium box bar but I decided to leave one side alone because that side will face the wall .And also one LED at the top .Design your own , For maximum illumination place LED's as close as to gather .If you are planing to go on every side I recommend you must use 9W led Driver , nine 1W LED's and bases . I leave some space at bottom because that part will be inside the Adapter.Here is how real Heat sink part look like -
 |
| DYI Home Made LED Lamp Heat sink |
The process
 |
| DYI Home Made LED Lamp Heat sink Compound |
First we must solder the LED's to bases - We must add some heat sink compound between SMD LED and the base and place it correctly and solder it while soldering put some pressure on the SMD LED to seat well ,Make sure there is no dirt or sand between the base and LED .Make sure The polarity is correct .The Cathode of the LED lead have a "-" sign (Hard to see)
 |
| 1W SMD LED Base polarity |
 |
| 1W SMD LED polarity |
 |
| 1W SMD LED soldered to the Base |
 |
| 1W SMD LED soldered to the Base |
The Wiring
The Next thing we have to do is to wire the LEDs . We are connecting these LEDs in series.Before doing such, I suggest that you should mount your LEDs to the heat sink (Aluminium Box bar) using screws.Don't forget to add some heat sink compound between the Heat sink and LED base before mounting them.then start wiring them First LED's + connected to the + of the LED driver.The (-) of that LED connected to the second LED's (+) again the (-) of the second LED soldered to the 3rd LED's (+) like wise until last LED .The Last LED's (-) connected to the (-) of the LED Driver. Here is the LED Diagram.
 |
| 7W LED Bulb Wiring Diagram |
 |
| DYI Home Made LED Lamp |
Driver Placement Insulation
After doing the wiring of the LEDs, Solder the 2 AC lines of the Driver to the bulb Adapter AC wires .and Place the Driver inside the Heat sink don't let the Driver parts directly contact with the heat sink. you can put the Driver inside a Heat shrinking tube ( Ø 25mm) and shrink the tube to cover it .I used Cardboard between the Driver and the Heat sink .
 |
| DYI Home Made LED Lamp |
 |
| DYI Home Made LED Lamp |
 |
| DYI Home Made LED Lamp |
Final Product Will be look like this -
 |
| DYI Home Made LED Lamp |
After setup -
 |
| DYI Home Made LED Lamp |
Another Customized LED light created by me -
 |
| DYI Home Made LED Lamp |


