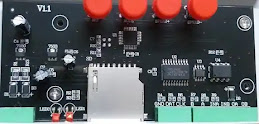
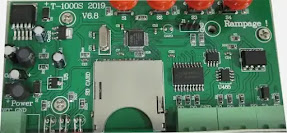
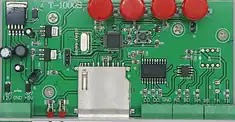
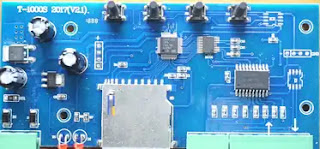
Have you ever wonder whats inside T-1000S pixel LED controller ?. , T-1000S pixel LED controller is one of the most used entry level pixel LED controllers available in the market .It's the first pixel LED controller that was introduced around year 2012 . However , The original T-1000S pixel LED controller is very hard to find .Most of the T-1000S pixel LED controllers available are clones or copy of the original T-1000S pixel LED controller. Since , Sellers wont show the PCB inside , There is no way you could tell which from which .In this Tutorial we are going to look inside these Clone T-1000S pixel LED controllers and show how it works . This tutorial series is for anyone who interested in building their own pixel LED controller.+
Original T-1000S vs Clone T-1000S
There are few differences between Original T-1000S and the clone T-1000S pixel LED controllers . For some reason the clone pixel LED controllers may have more than one microcontroller ICs . Also, The clone pixel LED controller may have missing components. Thus,less features . The original T-1000S pixel LED controller have all the features available . Above Photo shows the PCBs of original and Cloned versions of These controllers. As you can see , The original pixel LED controller have all the components . The Original pixel LED controller only have single microcontroller, Also it has the LED panel header . Here are some of the PCBs of pixel LED controllers available in the market .
T-1000S PCB 1
This T-1000 controller PCB very closely resembles the original T-1000S . There is only one microcontroller .The microcontroller uses external oscillator . All the components are present in the PCB .This PCB used lm2596 as the main regulator IC.Which can deliver much more current compared to 7805 linear regulator. There also the 1117 (3.3) regulator to supply the power to the microcntroller . As you can see in the PCB there is a 20pin header . This header can be used for connecting LED panels to this controller . Also you can see a program reset button in this PCB. There also a button interface IC.
T-1000S PCB 2
This controller PCB have lm2596 as the main regulator IC. There are three indicators instead of two . Optocopler IC being used for the next pixel LED controller signal output . The microcontroller in this case uses external oscillator. All the components are available . The panel header is not available .
T-1000S PCB 3
This controller PCB have lm2596 as the main regulator IC. Optocopler IC is not present. The microcontroller in this case
uses external oscillator. . The panel
header is not available . Microcontroller reset button is available .
T-1000S PCB 4
 |
| T-1000S PCB 4 |
This T-1000S controller PCB have a simple design . All the parts are available . The voltage regulator ICs current output is limited. However , They could deliver enough current for this simple circuit . But , can cause problems as the amount of pixel LEDs increases (If you are supplying Power VIA 7.5v to 24 v input). Current limiting resistors are available at both power input terminals. The SN5176B IC is available on this circuit . No panel headers available . PCB quality is good .
T-1000S PCB 5
As you can see in this PCb we have two 74HC245D transceiver ICs and one SN5176B transceiver IC .This PCB is also have two microcontrollers .Which means this is also a copy of the original T-1000S .The main regulator IC is LM2596 and there also the 1117(3.3) regulator IC . The only good thing about this design is that every output input signal to this controller goes through a transceiver IC .
T-1000S PCB 6
This is the controller PCB We are talking about in this tutorial. This PCB have two microcontrollers and one transceiver IC . The 5v regulator is LM7805 and the 3.3v regulator is 1117(3.3) . The button interface IC and RS485 transceiver IC is missing. This is the cheapest it can get . This is a cloned or copy of the Original T-1000S controller.
PCB version
The different PCB versions may have difference PCB layouts and components. The Version number is impotent when it comes to selecting the correct LEDEdit software version . However, the clone pixel LED controllers version number doesn't say much about the LED version that it can be used with . Different manufacturers have different PCB designs.
Disassembly
The T-1000S pixel LED controller housing being held by four screws , Two on each side . Remove them using a Philips screw driver .
Then , You will be able to remove the top half of the pixel LED controller .
Remove the push button knobs .
The PCB of the pixel LED controller being held by four screws . Remove them . Now , You should be able to remove the PCB from the housing.
Whats Inside
The T-1000S pixel LED controller can be devided to Three sections. The Power circuit , Microcontroller circuit , Final Output circuit . Here what's inside the T-1000S (Clone) version .
The Power Circuit
The Power Circuit
The power circuit consist of two input terminals . The 7.5 - 24v input terminal and 5v input circuit . There is a SMD diode and a resister in series with this line. The SMD diode is for reverse polarity protection and the SMD resister is for over current protection . This input line have a smoothing capacitor . Then this line connects to the 7805 linear regulator input . This regulator will convert the input voltage to 5v and supplied to the 5v trace of this PCB . This 5v will be supplied to the 1117(3.3v) regulator input as well . The 5v Terminal in the other hand directly connects to the 5v trace of the PCB (After the reverse polarity protection diode) . This gives an advantage over the 7.5v-24v terminal . Because , The current limitation of the 5v line is the current limitation that poses by the SMD diode . The 7.5v-24v line have many components that limits the current output such as diode , current limiting resistor and the 7805 regulator . So , The best method to get the full performance of this controller is by using the 5v power input terminal.
Microcontroller circuit
Since , This is a clone T-1000S . We have two microcontroller IC's . However , The original only have one microcontroller . The main purpose of the microcontroller is to read the effect file inside the SD card . This communication done using SPI pins of the microcontroller . The microcontroller can detect the pixel LED chip number and output the corresponding signals . The effect file contains mainly two data types . The effect file headder contains the controller data and the rest is the color data for each pixel led for each frame of the animation or the video . However The data inside the effect file are encrypted .
The first mirocontroller in the clone T-1000S reads the data from the SD card it also responsible for reading button inputs from the user . This first microcontroller will output the next pixel LED controller data as well . The second microcontroller outputs the Data signal and Clock signal . However it relies on the data provided by the first microcontroller.
Final Output circuit
The output from the microcontroller connects to the pins of ____ IC . It's a 8bit bus transceiver IC . The data signal from the microcontroller connects to 4 pins of this IC . The clock signal of the microcontroller connects to three pins of this IC . The controller data for next pixel LED controller connects to a single pin of this IC. The corresponding output pins at the other side are connected SMD resisters. These outputs are also connected together as the inputs after the SMD resistor . However one of the data outputs taken for the RS485 transceiver IC (SN5176B Which is missing) . So , The other three data signal pins are connected to the data out pin of the pixel LED controller . The three clock signal pins also connected together and connects to the clock output pin of the T-1000S pixel LED controller . The data output for the next pixel LED controller connects to the "Aout" pin of the controller .
Use of 74HC245D
There are several reasons when it comes to the use of this 8 bit bus transriciver IC . This Ic have high noice immunity at input pins , Which means the input signal noise have less effect on output signal. This IC have output current limitation , It will protect the IC in a case of high current or short circuit. The current dilivery of output pins are much higher compared to the
microcontroller. Download the Datasheet from here !
microcontroller. Download the Datasheet from here !
Use of SN5176B
This is also an differantial bus transriciver IC which is specificly designed for RS485 signal transmittion . This allows the microcontrollers data signal to be converted to the stranded RS485 signal transmittion. Used for pixel LEDs that use RS485 signal protocol .
Use of Optocoupler IC
You may have seen the use of optocoupler IC an the A and B outputs of some T-1000S pixel LED controllers . This is to isolate the microcontroller from the output device or the next controller in the network . This will protect the microcontroller in a case of short circuit ar those pins .


No comments:
Post a Comment