 |
| Pixel LED Edit - K led layout design Tutorial |
Before looking in to this tutorial please visit my first "LED Edit-K" version tutorial
If you didn't downloaded your LED Software
[To Download the latest Version LED Edit-K Software]
If you are interested in how to create a custom LED layout using AutoCAD software
[Click Here To See - How to create custom LED layouts using AutoCAD software ]
If you are interested in how to create a custom LED layout using AutoCAD software
[Click Here To See - How to create custom LED layouts using AutoCAD software ]
In my previous tutorial I have discussed how to use "led edit" software's manual layout creator to design LED layouts for your needs. In this lesson I'm going to discuss how to do the same thing in "LED Edit-K" versions. As I mention in my previous tutorial you can manually design LED layout by laying one led by one led ,But this is a waste of time .I'm Going to use the same method used in that article (BMP method) to create the LED layout.
Video Tutorial
Creating The BMP Reference
First follow the steps under the sub heading "Creating Frame Shaped LED Layout"In my [LED Edit Manual layout Tutorial].Follow the steps 1 to 10 in that article in order to create out "BMP" file in Photoshop software.I'm going to continue form there .
Run your "LED Edit -K" software .
Starting a New Project
01 Click on "File" and choose New" to create an new project .This will show up the new project window .Select the controller that you about to use from the "Controller Type" list and type the maximum number of LEDs you about to use per port in the "Max number lights of port" field.Please refer to "Starting a new project" section in my first " LED Edit - K" tutorial [Click Here] for more information. 02 Click on "Browse" button and select a location to save the project and click "OK".Click "OK" again in the "New Project" window.
Importing the BMP layout
 |
| Port selection |
01 Click on "Settings" in the top main bar and select "Import BMP reference point" .This will open up the "Open" window .Browse an select the .BMP file you created and click on "Open" button.
 |
| BMP layout |
Connecting LED
 |
| LED Wiring Plan |
 |
| Auto connect tool |
 |
| Selecting the sections |
 |
| Selection and wiring methods |
 |
| Connected leds |
Note that each section connected to each other automatically and now connected leds are yellow .If your selection went wrong use undo button to undo your action (Ctrl+Z doesn't works on LED Edit)
 |
| Undo Redo buttons |
05 Now we are done connecting it's time to program it .Please go to and continue from "Recording a Video or an Animation" section in my first " LED Edit - K" tutorial [Click Here] .To start program the LED layout that you have created .
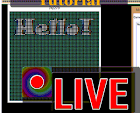
 |
| Final Outcome |
More related Links -


4 comments:
In LEDEDIT-K V5.1 GUI is slightly different from the above shown tutorial(instead of tools it shows "edit layout" above the ports) after importing BMP reference point frame is displayed but there is no option for connecting LEDS. When clicked EDIT LAYOUT new blank window is getting opened. in this window i tried to import BMP reference from settings tab but no layout is displayed. Need help
Yes ..This is a old tutorial ..I will update this tutorial with a video tutorial asap ..Thanks for the feedback !
Please checkout the Tutorial again .The tutorial has been updated . Check the video tutorial ..
Thank You !
I’m a newbie and wants to make a led Christmas tree. I am thinking of having 48 strings of Ws2811. Can you suggest how many t1000 controller we need and how to program the SD card? Appreciate the help.
Post a Comment